AC Brazing Procedure Step by Step – Complete HVAC Copper Pipe Brazing Guide for Air Conditioning Systems
The AC brazing procedure step by step is a fundamental technical skill in the HVAC and refrigeration industry, especially for technicians working with copper tubing in air conditioning systems. Proper brazing ensures strong, leak-free, and long-lasting joints that can withstand high pressure and temperature variations within refrigeration circuits. At eakonacadem.edu.my, understanding and mastering this process is essential for students, apprentices, and professionals aiming to achieve high-quality installation and maintenance standards in modern HVAC systems.
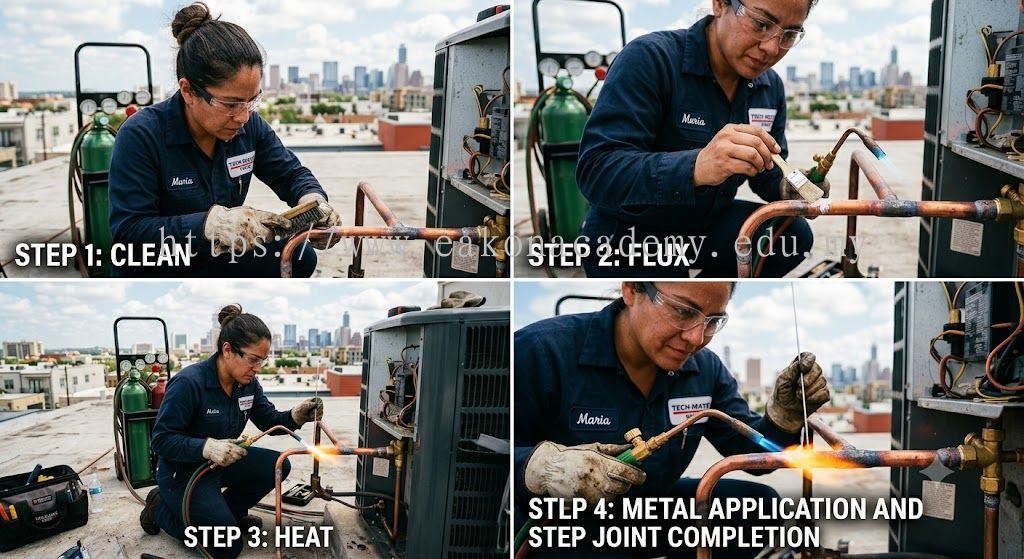
The first step in the AC brazing procedure is proper preparation of the copper pipes. Technicians must cut the copper tubing cleanly using a tube cutter to avoid deformation or burrs. After cutting, the edges should be deburred internally and externally to ensure smooth refrigerant flow and proper joint fitting. Cleanliness is critical, so both the pipe ends and fittings must be thoroughly cleaned using emery cloth or a dedicated cleaning brush to remove oxidation, oil, and dirt. Any contamination can weaken the brazed joint and lead to refrigerant leakage.
Next, proper alignment and fitting of the copper pipes must be carried out. The pipes should be inserted into the fittings with correct depth and alignment to ensure a uniform capillary gap. This gap is essential for proper filler metal flow during the brazing process. At this stage, technicians often apply a suitable flux (if required depending on the filler material) to help prevent oxidation and improve bonding strength during heating.
The third step in the AC brazing procedure step by step is nitrogen purging. Introducing a slow flow of nitrogen through the pipe system during brazing prevents internal oxidation, commonly known as scale formation. This step is extremely important in refrigeration and air conditioning systems because internal oxidation can block filters, damage compressors, and reduce system efficiency over time.
After preparation and purging, the heating process begins using an oxy-acetylene torch or appropriate brazing equipment. The flame must be adjusted to a neutral flame to ensure controlled and even heating. The joint area should be heated evenly until it reaches the correct brazing temperature, typically around 600°C to 650°C depending on the filler rod used. The technician should avoid overheating, as excessive heat can damage the copper structure and weaken the system.
Once the correct temperature is reached, the brazing filler rod is introduced to the joint. The rod should melt upon contact with the heated base metal and flow smoothly into the joint through capillary action. It is important not to melt the rod directly with the flame, but rather allow the heated pipe to melt the filler material for a stronger metallurgical bond.
After completing the brazing, the joint must be allowed to cool naturally without forced cooling methods such as water or air blasts. Rapid cooling can create stress cracks and weaken the joint integrity. Once cooled, the joint should be inspected for uniformity, complete sealing, and proper filler distribution.
Finally, the system should undergo leak testing and pressure testing to ensure the brazed joints are fully secure and capable of handling operational pressures. This step guarantees system safety and reliability before commissioning.
In conclusion, mastering the AC brazing procedure step by step is essential for any HVAC technician aiming for professional-level workmanship. Proper preparation, nitrogen purging, controlled heating, and correct filler application all contribute to a durable and efficient air conditioning system. Through structured learning and hands-on practice at eakonacadem.edu.my, learners can develop the technical expertise required to excel in the refrigeration and HVAC industry.
More detail about EAKON ACADEMY SDN BHD Malaysia